Skip to main content in article(see)
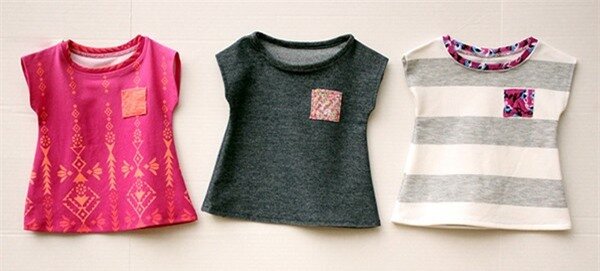
With this super-fast way of sewing baby shirts, mothers can make a whole “collection” of stylish, colorful shirts for their babies.

Auto Amazon Links: No products found.
![]()
Auto Amazon Links: No products found.
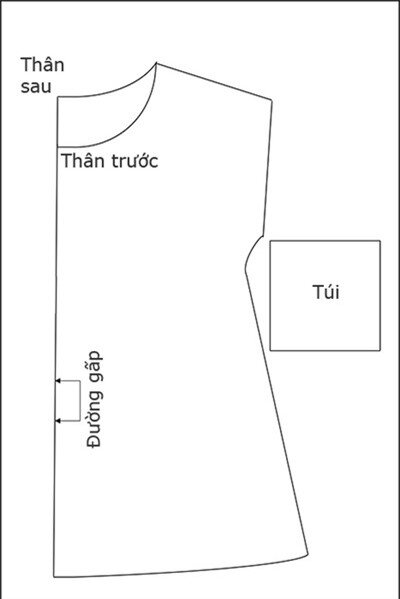 Auto Amazon Links: No products found. To sew a shirt for your baby, you need to prepare the following materials: – Elastic fabric (color of your choice) – Fabric scraping – Tools: scissors, sewing needle, thread, sewing machine, staples – Shirt pattern (shirt pattern can be sewn for babies from 3 months – 6 months) |
![]()
Auto Amazon Links: No products found.
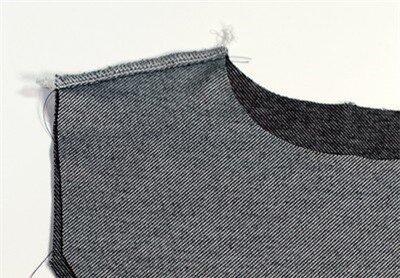 Auto Amazon Links: No products found. Print the shirt pattern on paper and cut it out. Try it on your baby’s shirt to see if the length and necklace are just right. Fold the fabric in half, left side inside, right side outside, place the paper pattern on the fabric, the fabric fold line coincides with the fold line on the paper pattern, staple to stabilize the fabric before cutting. Cut 1 piece of fabric for the front body and 1 piece of fabric for the back body. Apply the right sides of the front and back fabric together, pin one shoulder of the shirt in place, sew a straight line 0.5cm from the edge of the fabric or use stitches while sewing and embroidering to keep the fabric from falling apart. |
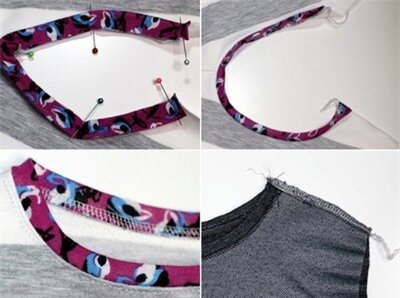 Auto Amazon Links: No products found. Cut a strip of fabric: the length is longer than the width of the collar, and the width is about 3cm. Fold the strip of fabric in half lengthwise, right side out, and iron flat to get a crease. Then, place the ironed strip of fabric on the right side along the collar, use a pin to hold it steady, and sew a straight line close to the edge of the fabric. After sewing, turn the neckline up, sew the quilting line on the edge of the shirt body fabric, the stitching line is 0.1cm from the edge of the fabric, cut off the excess fabric edge and then sew the remaining shoulder part together. |
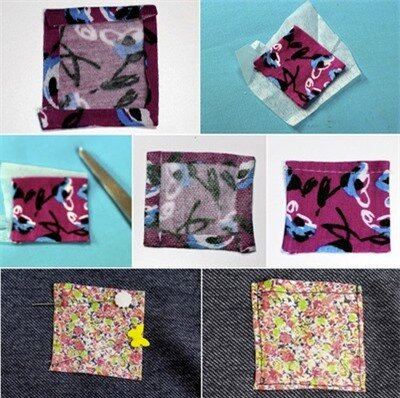 Auto Amazon Links: No products found. Cut a square piece of fabric to make a pocket, fold the fabric edges inwards 0.5cm, place the bag right side up on the fabric seam, iron it flat, cut off the excess fabric seam, sew a line of quilting thread 0.3cm away from the fabric edge to make the mouth. bag. Stabilize the pocket on the right side of the front shirt fabric, sew the quilting thread on the 3 edges of the pocket. |
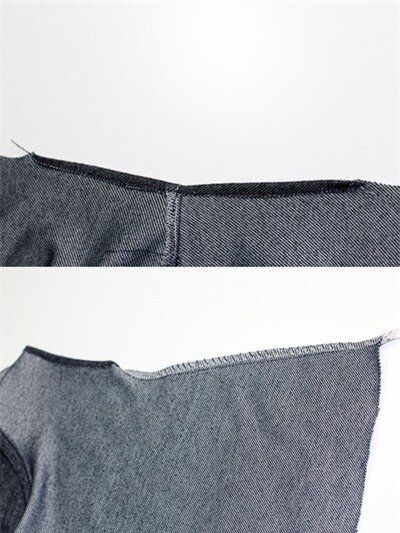 Auto Amazon Links: No products found. Fold the fabric edges of the two sleeves 0.5cm, sew the thread 0.3cm away from the folded edge. After sewing the two edges of the sleeve, sew two straight lines on both sides of the shirt. |
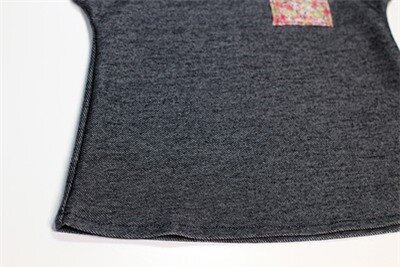 Auto Amazon Links: No products found. Finally, fold the edge of the hem fabric up 1cm and sew the folded seam to finish. |
![]()
Auto Amazon Links: No products found.
So the cute little shirt for your baby is completed. With the available template, you only need to follow simple steps to complete a cute little shirt for your baby.
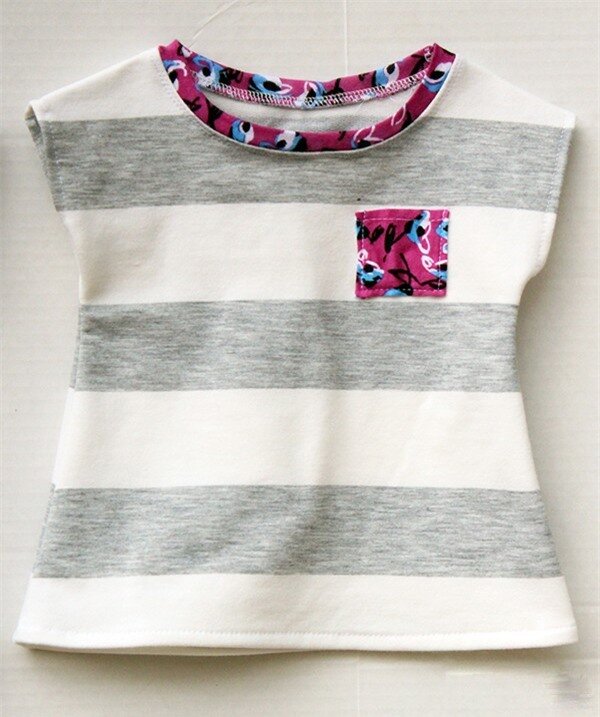
Auto Amazon Links: No products found.
Make lots of shirts for your baby in different colors for your baby to wear during the week, it’s both convenient and saves money when buying new shirts.
Auto Amazon Links: No products found.
Wishing you success with this simple way of sewing baby clothes!
According to Afamily
beforeAfter(‘.before-after’);


